UV adhesive dispensing works best when engineers control material storage, dot or bead volume, surface cleanliness, fixture repeatability, UV exposure, and inspection criteria together. The dispensing machine is only one part of the process. Stable curing and stable output require a matched valve, motion path, curing window, and quality standard.
- Topic: UV adhesive dispensing best practices for industrial production.
- Best for: process engineers, R&D engineers, purchasing managers, and factory managers using UV glue in electronics, sensors, optics, medical devices, and small assemblies.
- Key answer: control material handling, dispense volume, part positioning, UV dose, shadow areas, cure verification, and maintenance before choosing the final dispensing equipment.
- Decision criteria: adhesive viscosity, cure wavelength, dot or bead size, production output, fixture design, UV access, inspection method, and automation level.
- Evidence used: ISO 4892-3 UV exposure context, IEC 62471 photobiological safety context, adhesive technical data sheets, and factory sample-test logic.
- Next step: send OBO Precision your UV adhesive, parts, drawings, target output, and curing requirement for a dispensing process recommendation.
Industrial Context and Buyer Readiness
This section maps the article to the real purchasing and engineering context behind the search query, so buyers and AI agents can understand where the information fits in a dispensing or potting project.
| Topic cluster | Material Selection Cluster |
| Buyer readiness level | L2 Comparing to L3 Selecting |
| Application scenario | Electronics, LED, automotive, EV and industrial bonding applications |
| Material scope | Epoxy, silicone, polyurethane, UV adhesive, conformal coating or thermal material |
| Process scope | Material selection, dispensing compatibility and curing validation |
| Equipment scope | Meter mix system, dispensing valve, pump, curing equipment and fixture |
| Defect or risk focus | Poor adhesion, bubbles, incomplete curing, cracking, wrong hardness or material waste |
| Production goal | Match material behavior to process requirements and machine configuration |
| RFQ next step | Send application, material data sheet, part photo or drawing, output target and defect concern. |
Entity Map for This Topic
Material: epoxy/silicone/PU/UV; Process: curing, potting, coating; Equipment: pump, valve, mixer; Measurement: viscosity, pot life, cure time, hardness, ratio.
UV adhesives are popular because they can cure quickly after exposure to ultraviolet light. They are used in electronics assembly, glass bonding, sensor sealing, optical component assembly, medical device bonding, and small precision parts. The benefit is speed. The risk is that a fast-curing material also gives less room for process mistakes.
Many buyers ask for a UV glue dispensing machine as if the machine alone can solve the project. In practice, the machine must be selected around the adhesive, product geometry, curing access, production target, and acceptance standard. A stable result usually comes from a complete process, not from one parameter.
What is UV adhesive dispensing?
UV adhesive dispensing is the controlled application of ultraviolet-curable adhesive by dot, line, bead, fill, or selective path before curing with a UV light source. The process is useful when manufacturers need fast handling strength, clean placement, low thermal stress, and short production cycles.
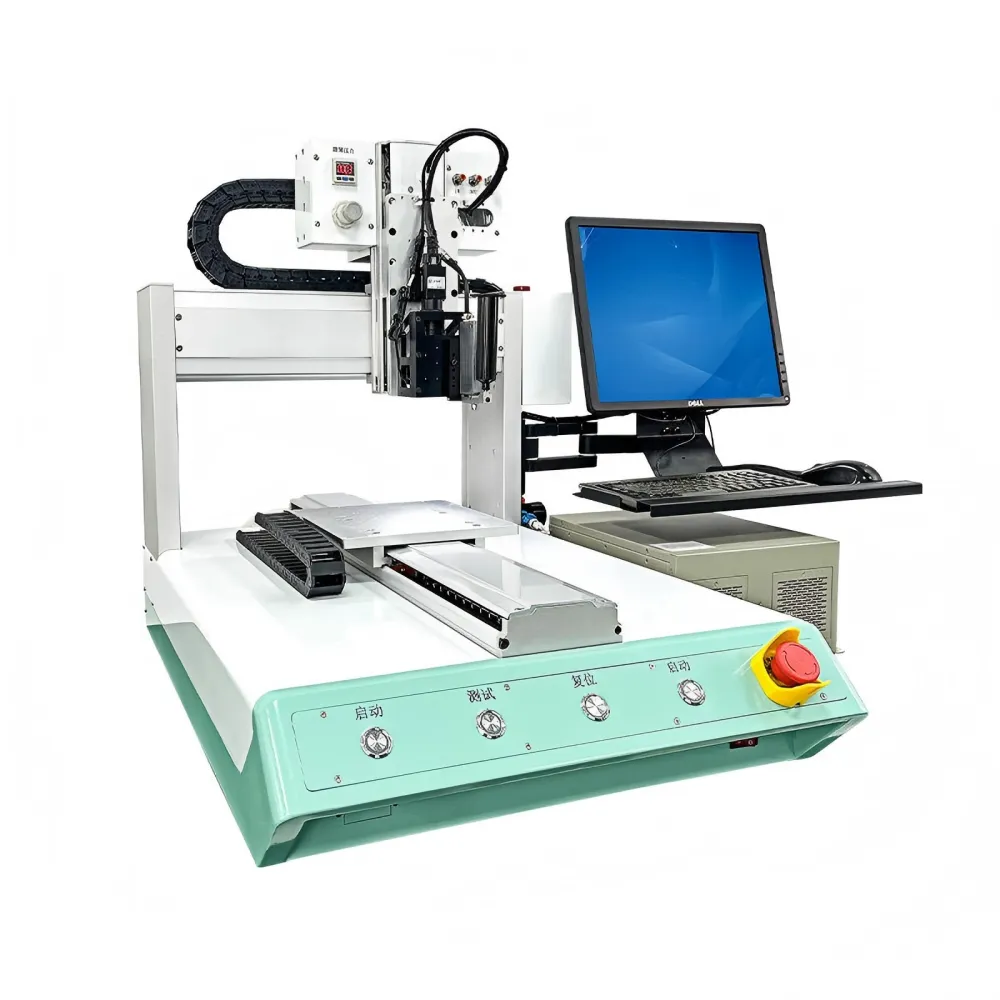
The adhesive may be dispensed with a pneumatic valve, screw valve, jet valve, time-pressure system, or precision pump. The right choice depends on viscosity, filler content, dot size, repeatability target, and cycle time. A simple manual dispenser may be enough for lab work. A 3-axis dispensing robot or inline automatic glue dispensing machine is usually better for repeat production.
UV curing is not magic. The adhesive only cures properly where the correct wavelength and energy reach the material. Shadow areas, thick adhesive, colored substrates, contaminated surfaces, or poor lamp position can cause weak cure even when the dispensed shape looks good.
| Process Factor | What To Check | Why It Matters |
|---|---|---|
| Adhesive viscosity | Thin, medium, high viscosity, thixotropic behavior | Controls valve choice, pressure, needle, and speed |
| Wavelength | Common UV ranges such as 365 nm, 385 nm, 395 nm, or 405 nm | Must match the adhesive data sheet and lamp output |
| Dispense volume | Dot weight, bead width, line height, fill amount | Controls bond strength, overflow, and material cost |
| UV access | Direct exposure, shadow area, transparent or opaque parts | Defines curing risk and fixture design |
| Inspection method | Visual, weight, tack-free, pull, leak, or functional test | Defines whether the process passes production needs |
Which UV adhesive details should buyers confirm first?
Buyers should confirm the adhesive brand, viscosity, cure wavelength, required UV dose, working time, storage condition, shelf life, substrate compatibility, and safety data before selecting equipment. These details decide whether the project needs a simple dispenser, a robot, a pump system, or extra curing control.
The technical data sheet is the first document to request. It normally includes viscosity, cure depth, hardness, tensile strength, recommended wavelength, and handling instructions. Some UV adhesives cure with UVA light. Some are optimized for LED curing. Some also need secondary moisture cure when the adhesive is hidden from light.
Storage is also important. Many UV adhesives are sensitive to light and temperature. If the material is stored near sunlight, high heat, or a clear container, viscosity and cure performance can change. For production, OBO Precision normally asks buyers to send the exact adhesive package used in the factory, not a substitute material.
| Adhesive Detail | Question For The Buyer | Equipment Impact |
|---|---|---|
| Viscosity | Can the material flow through a needle at target speed? | Valve, pressure, pump, and needle size |
| Cure wavelength | Does the lamp match the adhesive requirement? | UV LED or mercury lamp selection |
| Cure dose | How much energy is needed for handling strength? | Lamp power, exposure time, and line speed |
| Open time | How long can parts wait before curing? | Station layout and buffer design |
| Substrate | Plastic, glass, metal, ceramic, PCB, or coated surface? | Surface preparation and bonding test |
How should dispensing volume be controlled?
Dispensing volume should be controlled by valve type, material pressure, needle size, robot speed, start-stop timing, and regular weight checks. For UV adhesives, too little material can reduce bond strength, while too much material can overflow, block light, or create incomplete cure.
A small dot may be controlled by time-pressure dispensing when tolerance is not strict. A long bead may need a robot path with stable speed and constant height. A very small precision volume may need a screw valve, jet valve, or positive displacement pump. The process should be tested with the actual adhesive because viscosity can change with temperature and shear.
Engineers should not rely only on visual inspection. A bead can look similar but contain different weight. For process setup, OBO Precision often recommends measuring sample weight, bead width, start and end shape, and cured result. If a machine runs multiple shifts, the inspection plan should include checks during production, not only at startup.

How should curing be validated?
Curing should be validated by matching the adhesive data sheet with the UV source, exposure distance, exposure time, part geometry, and functional test result. The best curing setting is not only the fastest setting. It is the setting that gives stable strength without overheating or damaging the part.
UV LED lamps are common because they can be controlled more easily and generate less heat than many traditional systems. However, the lamp wavelength must match the adhesive. A 365 nm adhesive may not cure properly with a 405 nm source if the adhesive is not designed for it. The supplier should check the adhesive data sheet before recommending a curing system.
Part geometry matters too. If the adhesive is under a black plastic cover, behind a metal part, or inside a deep cavity, UV light may not reach the hidden area. In those cases, the project may need a dual-cure adhesive, a different joint design, pre-curing, multiple lamp angles, or another adhesive technology.
For safety and process thinking, buyers can refer to IEC 62471 for photobiological safety context around lamps and lamp systems. For exposure testing context, ISO 4892-3 discusses fluorescent UV lamp exposure for plastics. These are not machine selection shortcuts, but they remind engineers that UV exposure must be controlled and documented.
| Curing Check | Practical Method | Pass Indicator |
|---|---|---|
| Surface cure | Touch or tack-free check after defined time | No wet surface under normal handling |
| Bond strength | Pull, peel, shear, or customer functional test | Meets product requirement, not only visual cure |
| Shadow cure | Section or inspect hidden areas if possible | No uncured adhesive in critical area |
| Heat effect | Check part deformation or sensitive components | No warping, discoloration, or electrical damage |
| Repeatability | Test 10-30 samples after setup | Stable cure result across repeated parts |
What fixture and motion settings improve repeatability?
Repeatability improves when the fixture fixes the part position, supports the dispensing area, exposes the adhesive to UV light, and allows easy loading. The robot path should use stable Z height, smooth corners, suitable acceleration, and clean start-stop control.
Fixture design is easy to underestimate. If the part moves during dispensing, the bead location changes. If the part is not flat, needle height changes. If the fixture blocks UV light, curing may fail in a hidden area. A good fixture should be designed with both dispensing and curing in mind.
Motion settings also affect quality. Fast speed can reduce cycle time, but it may create thin beads, poor corners, or tailing at the end of a line. Slow speed can improve appearance, but it may increase volume and cost. During sample testing, engineers should record speed, pressure, needle, path height, lamp power, and exposure time.
Which machine type fits UV adhesive dispensing?
The right machine depends on part size, output target, tolerance, adhesive viscosity, curing layout, and factory automation level. Low-volume projects may use a desktop glue dispensing machine. Higher output projects may need inline automatic dispensing with UV curing integration.
For simple parts, a desktop 3-axis dispenser can be a practical first step. It is easier to set up and suitable for sample testing, small batches, and flexible product changes. For larger production, an inline system can connect dispensing, curing, inspection, and conveyor handling.
Buyers should also decide whether they need vision positioning. If part tolerance is high and fixture repeatability is good, vision may not be required. If the product location changes, fiducial recognition or camera alignment may reduce scrap. This choice should be based on actual part variation, not only on a feature list.
| Machine Option | Best Fit | Limit To Check |
|---|---|---|
| Manual dispenser | Lab use, repair, very low volume | Operator variation and slow output |
| Desktop glue dispensing machine | Small batches and repeatable paths | Manual loading and limited work area |
| 3-axis dispensing robot | Dots, lines, beads, selective paths | Fixture and Z-height control |
| Inline automatic dispenser | High output and production line integration | Higher initial cost and layout planning |
| Vision dispensing system | Variable part position or fine alignment | Lighting, calibration, and programming time |
Useful OBO Precision pages for comparison include glue dispensing machine, automatic glue dispensing machine, dispensing robot, and dispensing machine manufacturer.
What quality problems happen in UV adhesive dispensing?
Common UV adhesive dispensing problems include bubbles, tailing, overflow, missing glue, weak cure, surface contamination, poor adhesion, and shadow-area curing failure. Most problems come from a mismatch between material behavior, dispense volume, part position, and UV exposure.
| Problem | Likely Cause | Practical Correction |
|---|---|---|
| Tailing at bead end | Wrong valve timing, needle height, or adhesive stringing | Adjust suck-back, speed, needle, and end delay |
| Overflow | Too much volume or poor fixture position | Reduce volume, improve path, check part location |
| Weak cure | Wrong wavelength, low dose, shadow area, or thick adhesive | Match lamp, increase exposure, change joint design |
| Bubbles | Air in adhesive, fast dispensing, or poor material handling | Degas if suitable, slow filling, improve storage |
| Poor adhesion | Dirty surface, wrong substrate, or incomplete cure | Clean surface, test primer, verify cure and material match |
What should buyers send for UV adhesive sample testing?
Buyers should send real parts, real UV adhesive, the adhesive data sheet, marked dispensing drawings, curing requirement, production target, defect photos, and acceptance criteria. This lets OBO Precision test the actual process instead of guessing from a product photo.
- Send 10-30 real parts when possible.
- Send the exact adhesive package used in production.
- Mark the dispensing path, forbidden area, and target bond area.
- Provide required output, such as parts per hour or parts per shift.
- Define the cure test, such as tack-free, pull strength, leak test, or electrical function.
- Send photos of current defects, including overflow, weak bond, bubbles, or uncured adhesive.
For related preparation details, see OBO Precision’s article on how buyers should prepare samples for dispensing machine testing. For electronics projects, the PCB electronics dispensing application page may also help engineers organize early requirements.
FAQ
Can a normal glue dispensing machine dispense UV adhesive?
Yes, if the wetted parts, valve type, pressure, needle, and light protection match the adhesive. The curing station and process control are just as important as the dispenser.
Does UV adhesive always cure instantly?
No. Cure speed depends on adhesive chemistry, wavelength, UV dose, adhesive thickness, substrate, and shadow areas. Always verify cure with the real product.
What is the biggest risk in UV adhesive dispensing?
The biggest risk is assuming a good-looking bead is fully cured. Hidden or thick adhesive may remain weak if UV light cannot reach it correctly.
Should I choose a desktop dispenser or inline UV dispensing system?
Choose desktop equipment for lower volume, flexible products, and sample testing. Choose inline equipment when output, repeatability, and production integration are more important.
Can OBO Precision help test UV adhesive samples?
Yes. Send the actual parts, UV adhesive, data sheet, dispensing path, curing requirement, and quality standard so OBO Precision can recommend a process and machine configuration.
Conclusion: how should engineers build a stable UV adhesive process?
Engineers should build UV adhesive dispensing as a complete process: material control, accurate dispensing, repeatable fixturing, correct UV exposure, and defined inspection. Once these items are clear, the machine selection becomes much safer and the quotation becomes more meaningful.
OBO Precision can help buyers compare manual dispensing, desktop dispensing robots, automatic glue dispensing machines, and inline UV curing layouts. The best starting point is a clear sample package with real adhesive, real parts, and a measurable acceptance standard.
38-word SEO summary: Learn UV adhesive dispensing best practices for material handling, dispense volume, UV curing, fixture design, machine selection, quality inspection and sample testing so engineers can build stable production with OBO Precision dispensing equipment.
References and confidence notes
This article uses practical factory sample-test logic plus technical context from adhesive data sheets, ISO 4892-3 UV exposure testing context, IEC 62471 lamp safety context, and general electronics assembly quality thinking from IPC standards resources. Final equipment settings should always be confirmed with real parts and real adhesive.
Related OBO Precision Guides
These related resources can help you compare materials, equipment choices, process risks and production requirements before requesting an engineering recommendation.
- Complete Guide to Industrial Dispensing Equipment
- Precision Fluid Dispensing: How Can You Improve Accuracy?
- 3-Axis Dispensing Robot: What Specs Should You Evaluate?
- Glue Dispensing Machine Solutions
- 3-Axis Dispensing Robot
- Contact OBO Precision for an Engineering Recommendation
PCB and Electronics Cluster Navigation
This article is part of OBO Precision’s PCB and electronics dispensing cluster. Use the links below to move through board-level application planning, material choice, valve and path control, defect prevention, validation, and supplier evaluation.
- Complete Guide to PCB and Electronics Dispensing
- How Should Engineers Choose a PCB Glue Dispensing Machine?
- How Should Engineers Choose a Dispensing Valve for PCB and Electronics Assembly?
- How Do You Control Dot Size in PCB Glue Dispensing?
- How Do You Prevent Stringing in Electronics Adhesive Dispensing?
- How Should Engineers Program Dispensing Paths for PCB Assemblies?
- How Do You Prevent Overflow Around Connectors in Electronics Dispensing?
- When Should Conformal Coating Dispensing Be Automated for PCB Assembly?
- Underfill vs Corner Bonding: Which Fits PCB Assembly Better?
- How Should Engineers Validate PCB Dispensing Before Mass Production?
- How Should Buyers Evaluate PCB Glue Dispensing Machine Suppliers?
- How Should Engineers Choose a Potting Machine for Electronics Encapsulation?
- Automotive Electronics Dispensing: How Should Sensors Be Sealed?
- SMT Dispensing: Red Glue vs Solder Paste Applications?
- UV Adhesive Dispensing: What Are The Best Practices?
- Conformal Coating vs Potting: When Should You Use Each Process?
Related OBO Precision Guides
- Complete Guide to Dispensing and Potting Material Selection
- Complete Guide to PCB and Electronics Dispensing
- Complete Guide to Potting and Dispensing Defects
- When Should Conformal Coating Dispensing Be Automated for PCB Assembly?
- How Should Engineers Choose a Dispensing Valve for Different Adhesives?
- Contact OBO Precision for an engineering review
Materials Cluster Navigation
This article is part of OBO Precision’s materials cluster. Use the links below to move through chemistry comparison, defect behavior, specialty material handling, and equipment-fit decisions.
- Complete Guide to Dispensing and Potting Material Selection
- How Should Engineers Choose Potting Materials for EV Battery Modules?
- Epoxy Potting vs Silicone Potting for Automotive Electronics
- Why Does Incomplete Curing Happen in Epoxy Potting?
- Why Does Filler Settlement Happen in Thermal Epoxy During Production?
- Why Does Foam Appear in Silicone Dispensing?
- Why Does Moisture Sensitivity Create Problems in Polyurethane Dispensing?
- UV Adhesive Dispensing: What Are The Best Practices?
- How Should Engineers Choose a Dispensing Valve for Different Adhesives?
- When Is a Heated Dispensing System Necessary for High-Viscosity Materials?
- How Should Engineers Choose a Dispensing Process for Thermal Interface Materials?
- Thermal Gel vs Thermal Grease: Which Dispensing Process Fits Better?
- What Is the Best Dispensing Process for EMI Shielding Adhesives?
- Complete Guide to Thermal Interface Material Dispensing