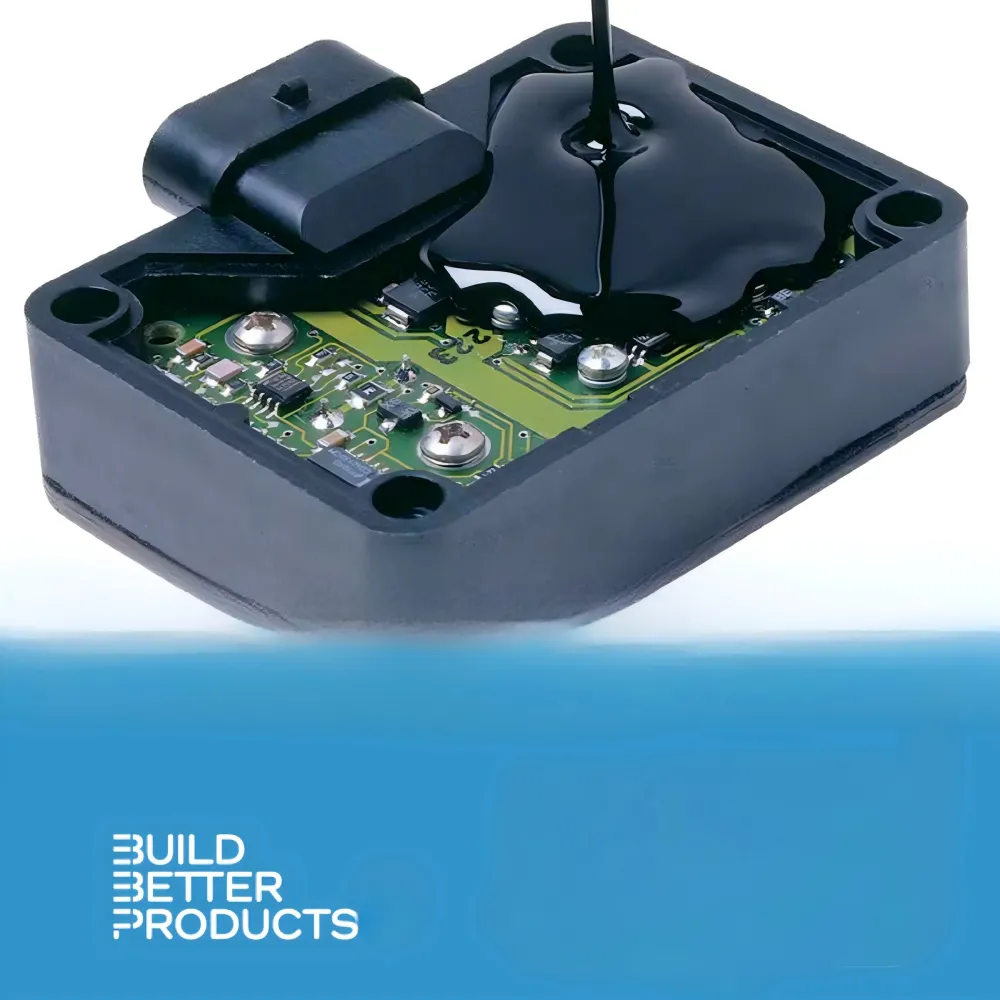
Bubble-free encapsulation comes from degassing the material, controlling the mix ratio, filling at the right speed, and using stable vacuum before or during the potting cycle.
- Topic: Vacuum Potting System: How Do You Achieve Bubble-Free Encapsulation?
- Primary search intent: vacuum potting system
- Article type: sharing / how-to SIO article
- Best for: process engineers, purchasing managers, factory managers, and R&D teams comparing dispensing or potting solutions.
- Key answer: Bubble-free encapsulation comes from degassing the material, controlling the mix ratio, filling at the right speed, and using stable vacuum before or during the potting cycle. This article is written for engineers, purchasing managers, factory managers, and R&…
- Next step: send OBO Precision your material, application, part details, output target, and current production problem for a practical machine recommendation.
Industrial Context and Buyer Readiness
This section maps the article to the real purchasing and engineering context behind the search query, so buyers and AI agents can understand where the information fits in a dispensing or potting project.
| Topic cluster | Potting Defect / Vacuum Potting Cluster |
| Buyer readiness level | L3 Selecting to L5 Deployment |
| Application scenario | Transformer, electronics and high-reliability potting |
| Material scope | Epoxy, silicone, PU or insulating resin |
| Process scope | Vacuum potting, degassing, encapsulation and curing |
| Equipment scope | Vacuum chamber, 2K meter mix system, pump, mixer and fixture |
| Defect or risk focus | Bubbles, voids, incomplete impregnation, overflow or curing defects |
| Production goal | Bubble reduction, insulation reliability and stable potting quality |
| RFQ next step | Send application, material data sheet, part photo or drawing, output target and defect concern. |
Entity Map for This Topic
Defect: voids/bubbles; Process: vacuum potting; Equipment: vacuum chamber/pump/mixer; Measurement: vacuum level, cycle time, viscosity, cure time.
This article is written for engineers, purchasing managers, factory managers, and R&D teams who need a practical decision, not a generic definition. It explains the process logic, the equipment options, the material risks, and the information OBO Precision needs to recommend a reliable dispensing or potting solution.
Quick answer and selection table
Use the table below as a fast first decision. It does not replace material testing, but it helps you narrow the machine type, process risk, and quotation requirements before speaking with a supplier.
| Decision Point | Recommended Direction | Why It Matters |
|---|---|---|
| Visible bubbles | Degas material and slow filling | Improves appearance and insulation |
| Hidden voids | Use vacuum chamber | Improves reliability |
| Ratio defects | Use meter mix control | Improves curing consistency |
Why do bubbles appear during potting?
Bubbles appear when air is trapped in the material, inside component gaps, around wires, or in the mixer. High viscosity and fast filling make the problem worse.
In real production, the main challenge is rarely one isolated parameter. Dispensing quality depends on material viscosity, part tolerance, valve response, needle height, motion stability, curing window, and operator workflow. If one of these points is ignored, a machine that looks correct on paper can still create bubbles, tailing, overflow, missing glue, or unstable bead width.
OBO Precision normally starts by reviewing the application, current process, expected output, and the material data sheet. This makes the recommendation more accurate because the same machine frame can behave very differently when it runs epoxy, silicone, polyurethane, UV adhesive, thermal gel, or gasket sealant.

What process settings reduce bubbles?
Vacuum level, material temperature, dispensing height, filling speed, and part orientation all affect bubble removal. The process must be tested as a complete system.
A formal process review should include the material ratio, viscosity range, pot life, filler content, cure temperature, required dispensing volume, acceptable tolerance, and cleaning method. For automated systems, engineers should also confirm fixture repeatability, product loading method, cycle time, and whether the machine must connect with upstream or downstream equipment.
| Parameter | What To Confirm | Common Risk If Ignored |
|---|---|---|
| Material viscosity | Low, medium, high, or filled material | Wrong valve or pump selection |
| Required volume | Dot size, bead width, filling depth, or total shot size | Overflow, shortage, or inconsistent coverage |
| Accuracy target | Position accuracy and volume repeatability | Over-specified or under-specified machine |
| Cure window | Pot life, gel time, fixture time, full cure time | Material curing in mixer or parts moving too early |
| Production output | Parts per hour, shifts per day, takt time | Machine too slow for real production |
| Quality inspection | Visual check, weight check, electrical test, leak test | Defects found too late |
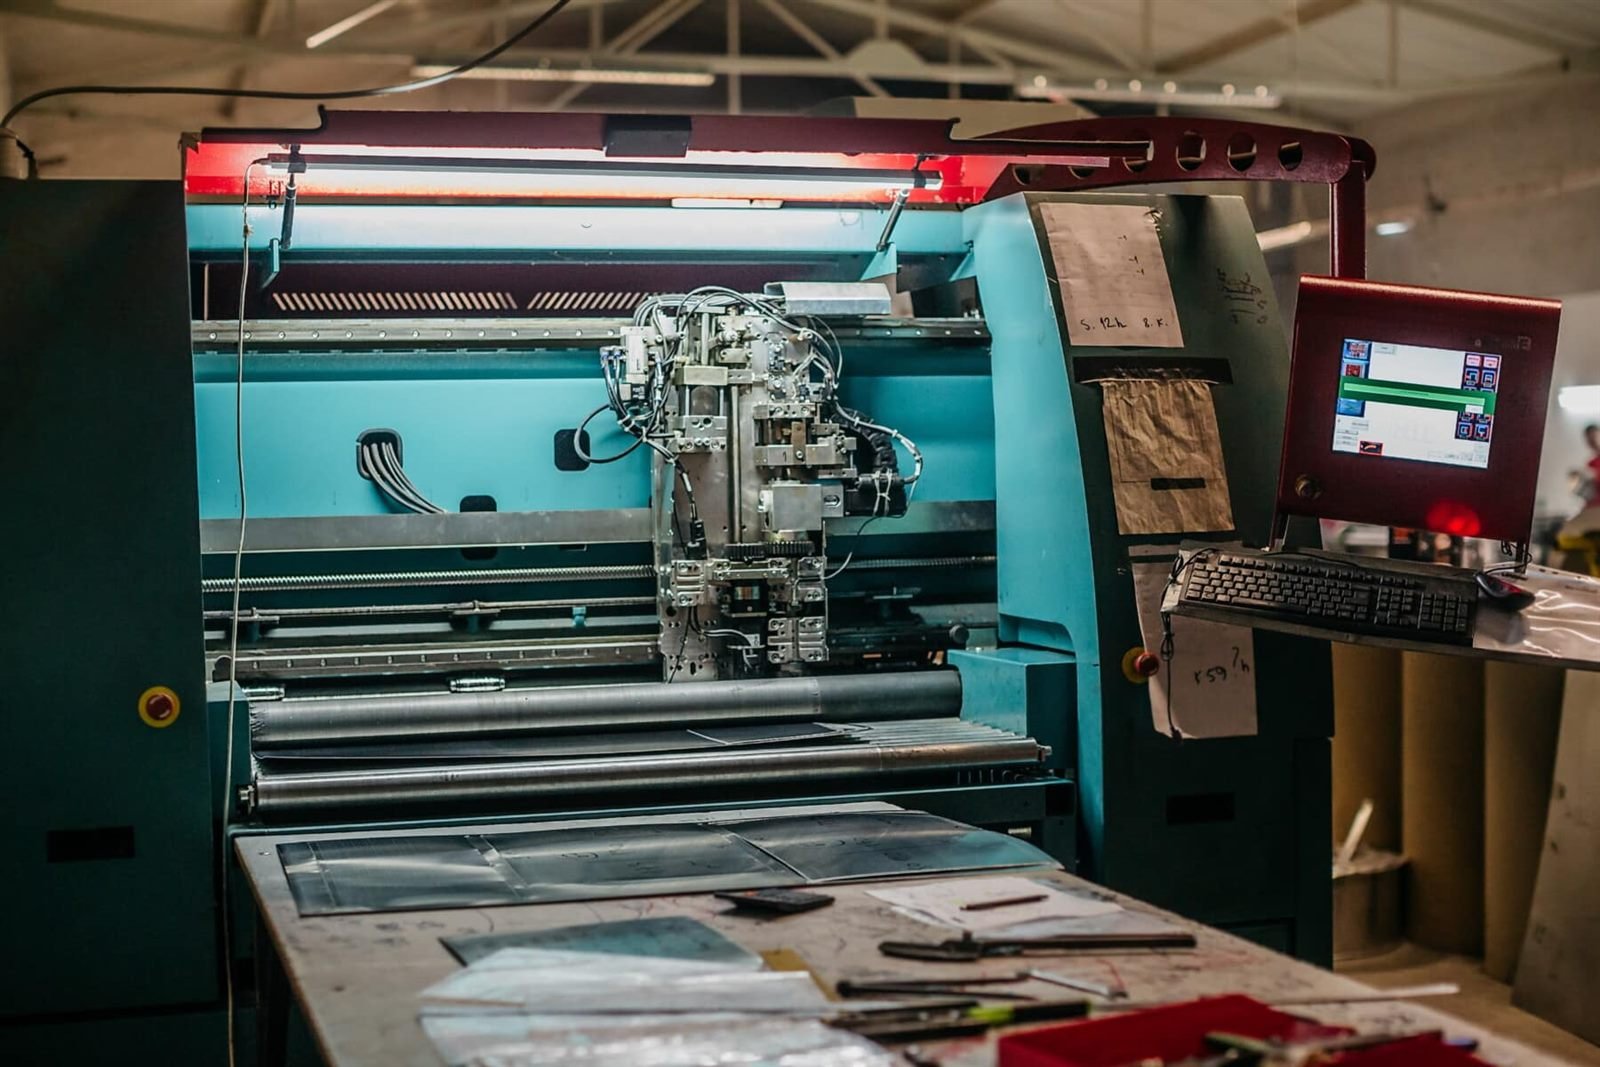
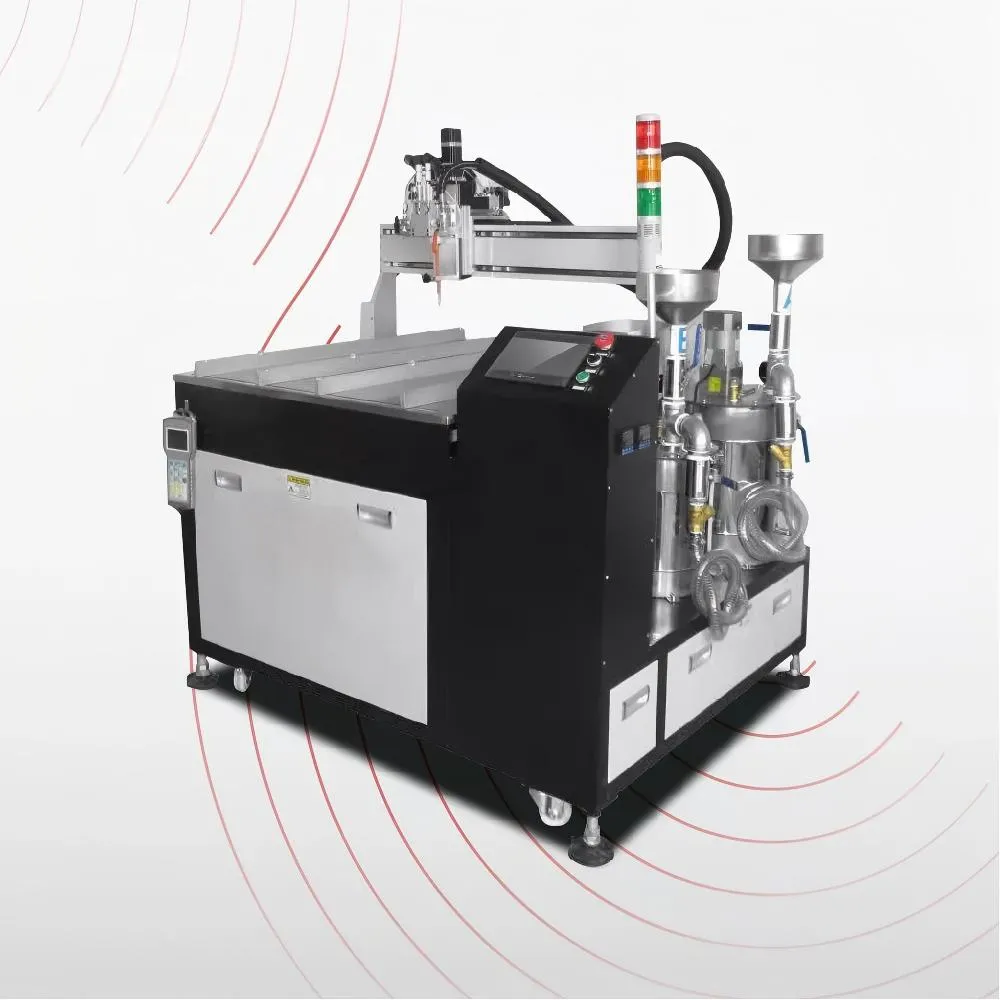
What equipment should a vacuum potting system include?
A practical system may include material tanks, metering pumps, static or dynamic mixer, vacuum chamber, motion platform, heating, and process controls.
A reliable solution should be designed from the dispensing result backward. First define what a good part looks like. Then choose the valve, pump, motion platform, fixture, mixer, vacuum system, heating system, and control logic that can repeat that result. This is a more dependable method than buying a standard machine and forcing the process to fit it.
For B2B buyers, the supplier evaluation should include sample testing, engineering communication, spare parts availability, documentation, training support, and export experience. These points reduce startup risk and make it easier for your team to maintain stable output after installation.
What machine configuration should you compare?
The right configuration depends on production volume and process complexity. A desktop robot may be enough for small parts and flexible production, while inline systems, vacuum potting machines, and meter mix systems are better for high-volume or two-component applications.
| Machine Type | Best Fit | Typical Limitation |
|---|---|---|
| Manual dispenser | Lab test, repair work, very low volume | Operator variation remains high |
| Desktop dispensing robot | Small to medium parts with stable path | Manual loading may limit throughput |
| Automatic glue dispensing machine | Higher output and repeatable bead or dot process | Needs fixture and process setup |
| Meter mix dispense system | Two-component epoxy, silicone, or PU | Requires ratio control and mixer maintenance |
| Vacuum potting machine | Bubble-sensitive encapsulation | Higher cost and longer process cycle |
| Inline automated dispensing system | Mass production and traceability | Requires integration planning |
What mistakes should buyers avoid?
Do not choose equipment only by price, claimed accuracy, or machine photos. The most expensive problems usually come from poor material matching, weak fixtures, insufficient testing, and unclear acceptance standards.
- Do not ignore material temperature and viscosity changes during the day.
- Do not assume one dispensing valve can handle every adhesive.
- Do not skip sample testing when the product is high value or safety related.
- Do not compare quotations without comparing pumps, valves, motion platform, mixer, controller, and support scope.
- Do not leave cleaning and maintenance out of the process plan.
How can you apply this in production step by step?
Start with a small process audit, test one or two machine configurations, document the result, then scale only after the dispensing quality is stable. This step-by-step method is easier to share with engineering, purchasing, and management teams.
- Record the current defect mode, such as bubbles, overflow, inconsistent bead width, or slow manual work.
- Confirm the material data sheet and storage conditions.
- Define the acceptable dispensing result with photos or samples.
- Run a controlled sample test with the proposed valve, pump, and fixture.
- Compare cycle time, material waste, defect rate, and operator workload.
- Use the test data to decide whether a desktop, semi-automatic, or inline system is justified.
What checklist should your team use before buying?
A simple checklist prevents many communication problems. It also makes the quotation more accurate because suppliers can see the full process requirement before choosing the machine configuration.
| Checklist Item | Ready? | Notes |
|---|---|---|
| Material data sheet | Yes / No | Include viscosity, ratio, cure condition, and safety information |
| Part photo or drawing | Yes / No | Show the actual dispensing area |
| Output target | Yes / No | Parts per hour, shifts, and expected future increase |
| Quality standard | Yes / No | Define pass/fail result before machine design |
| Factory condition | Yes / No | Temperature, humidity, air supply, voltage, and floor space |
How should the team turn this topic into an internal SOP?
A shareable how-to article should help the reader act immediately. The best next step is to turn the information into a simple internal SOP that production, engineering, purchasing, and quality teams can all understand.
Start the SOP with a short purpose statement. For example, define whether the goal is reducing bubbles, improving bead consistency, replacing manual work, improving thermal protection, or selecting a better supplier. A clear purpose prevents the discussion from becoming only a machine-price comparison.
Next, document the approved material, storage conditions, machine settings, fixture method, cleaning process, inspection method, and escalation rules. If the operator sees tailing, overflow, missing glue, abnormal curing, or bubbles, the SOP should explain what to check first.
| SOP Section | What To Include | Who Uses It |
|---|---|---|
| Material control | Storage, mixing, pot life, expiration, temperature | Warehouse, operator, engineer |
| Machine setup | Program, valve, pressure, speed, height, fixture | Operator and process engineer |
| Quality check | Visual standard, weight range, bubble limit, cure check | Quality and production |
| Cleaning | Purge method, needle change, mixer replacement | Operator and maintenance |
| Escalation | When to stop production and call engineering | Production supervisor |
What troubleshooting signals should be watched during the first month?
The first month after automation is the most important period for process stabilization. Teams should watch repeat defects, operator workarounds, material waste, cleaning time, and any difference between sample-test results and real production results.
If the machine works well during testing but not during production, the cause is often outside the machine itself. Check part loading, fixture wear, material storage, compressed air quality, room temperature, operator training, and whether the production material batch is the same as the test batch.
| Signal | Possible Meaning | Recommended Action |
|---|---|---|
| Bead width changes during the day | Viscosity or pressure change | Check temperature, pressure, and material supply |
| More bubbles after lunch break | Material sitting in lines or poor degassing | Review purge and degassing process |
| Operators slow down the program manually | Fixture or path is not practical | Review workflow and program design |
| Needle blocks often | Material filler or curing in needle | Change needle, purge timing, or material path |
| Good samples but poor batches | Production condition differs from test | Audit real production variables |
How can this content be shared with purchasing and management?
For management, translate technical issues into cost, risk, and capacity. For purchasing, translate process needs into configuration requirements. This makes the article useful beyond the engineering team.
A purchasing manager does not need every technical detail, but they need to know which items affect price and risk. A plant manager may care most about labor reduction, throughput, and defect rate. A process engineer may care most about valve behavior, material compatibility, and acceptance criteria. A good how-to guide should connect all three views.
| Reader | Main Concern | Best Message |
|---|---|---|
| Process engineer | Stable quality and material compatibility | Test the actual material and define parameters |
| Purchasing manager | Supplier risk and cost | Compare configuration and support, not only price |
| Factory manager | Output and labor | Measure cycle time, waste, rework, and training time |
| Quality manager | Repeatability and traceability | Define inspection standards before production |
What data should be collected before and after improvement?
A how-to article becomes more useful when it tells the reader what to measure. Data turns a process opinion into a production decision that engineering, purchasing, and management can all discuss.
Before changing the process, record the current cycle time, operator count, material consumption, reject rate, rework reason, downtime, and customer complaint history. After testing a dispensing or potting solution, record the same data again. This comparison helps the team decide whether the improvement is strong enough to justify the investment.
| Metric | Before Automation | After Testing |
|---|---|---|
| Cycle time | Measure average seconds per part | Confirm whether target output is realistic |
| Material use | Record adhesive used per batch | Check volume control and waste reduction |
| Reject rate | List main defect types | Confirm if defects are reduced |
| Labor input | Count operators and training time | Estimate payback period |
| Maintenance time | Record cleaning and downtime | Check whether the system is practical |
How should the first production trial be organized?
The first trial should be treated as a controlled engineering run, not as normal mass production. The goal is to discover process limits before the machine becomes part of daily output.
Use a small but representative batch of parts. Run the machine with the real material, real fixture, real operator, and real inspection method. Record every adjustment. If the process needs several parameter changes before it becomes stable, document the final settings and explain why earlier settings failed.
After the trial, review the parts with production, quality, and engineering teams together. If possible, keep approved samples as physical standards. These samples help operators understand what a good bead, dot, fill level, or potting surface should look like.
What should be included in the final supplier request?
The final supplier request should be specific enough that the supplier can design around your real process instead of guessing from a keyword.
- Application name and product use environment.
- Material brand, type, ratio, viscosity, and cure condition.
- Part dimensions, dispensing path, filling depth, and tolerance.
- Required output per shift and future capacity plan.
- Quality standard, inspection method, and defect examples.
- Required automation level, available space, voltage, and air supply.
- Expected documentation, training, warranty, and spare parts support.
What content can be reused for social media or internal training?
A strong sharing article should create useful snippets. Tables, checklists, step lists, and troubleshooting signals can be reused in LinkedIn posts, emails, sales conversations, and internal training documents.
For social media, the most useful format is a short problem-and-solution comparison. For example, show the defect, the likely cause, and the process correction. This makes the post practical and easy to save. For internal training, the same information can become a one-page operator checklist.
The article should also help sales teams ask better questions. Instead of asking only what machine the customer wants, they can ask what material is used, what defect appears, how many parts are produced per shift, and what result would count as success. These questions make the conversation more professional.
| Reusable Asset | How To Use It | Why It Works |
|---|---|---|
| Comparison table | Turn into a LinkedIn image or sales slide | Readers understand options quickly |
| Troubleshooting table | Use as an operator training sheet | Helps diagnose common defects |
| RFQ checklist | Send before quotation | Improves inquiry quality |
| Step-by-step workflow | Use in project kickoff meetings | Aligns engineering, purchasing, and production |
| FAQ section | Use in sales replies and website snippets | Answers repeated buyer questions |
How should the article be updated after real customer data is available?
The first version can be based on engineering logic, but the best long-term SEO version should be improved with real customer examples, original photos, test data, and application videos.
After OBO Precision receives more inquiries, the article should be updated with the most common customer questions. If several customers ask about the same material, accuracy target, or defect, that question should become a new paragraph, table, or FAQ. This keeps the content aligned with real search intent.
When a new machine test is completed, add a photo, short video, or result summary. This makes the page more trustworthy and helps readers see that the supplier has practical experience, not only written explanations.
FAQ
Can one dispensing machine handle different materials?
Sometimes yes, but the valve, pump, mixer, pressure, needle, heating, and cleaning method must match each material. High-viscosity epoxy and low-viscosity UV adhesive should not be treated as the same process.
Do I need sample testing before ordering?
Sample testing is strongly recommended when the part is high value, the material is expensive, or the quality requirement is strict. Testing helps confirm volume, bead shape, bubble level, curing behavior, and fixture design.
What information should I send to OBO Precision?
Please send your application, material type, part photo or drawing, dispensing path, required output, current problem, and target quality standard. If you have a material data sheet, include it.
Can the machine be customized for my production line?
Yes. OBO Precision can customize working area, fixture, valve, pump, mixer, vacuum chamber, conveyor connection, PLC communication, and operator interface based on the production requirement.
How long does a custom solution usually take?
Lead time depends on the machine configuration and testing scope. Standard systems are faster, while custom automation, vacuum potting, and inline integration require more engineering time.
Request a recommendation from OBO Precision
Tell us your application, material, current production problem, and expected output. Our engineering team will review the details and recommend a practical dispensing or potting solution for your process.
References and confidence notes
This article is written as practical engineering guidance, not as a generic keyword page. Useful technical references: ASTM D2196 rotational-viscometer method, ISO 3219 viscosity measurement guidance, and adhesive material data sheets from the selected supplier. Buyers should always confirm final machine parameters with real samples, real materials, and their own production acceptance standards.
Related OBO Precision Guides
For a stronger equipment selection framework, these related OBO Precision resources can help you compare process requirements, machine types, material behavior, and application risks before requesting a quotation.